CS348B Final Project
Michael Madison II and Nader Zaki
The
Project
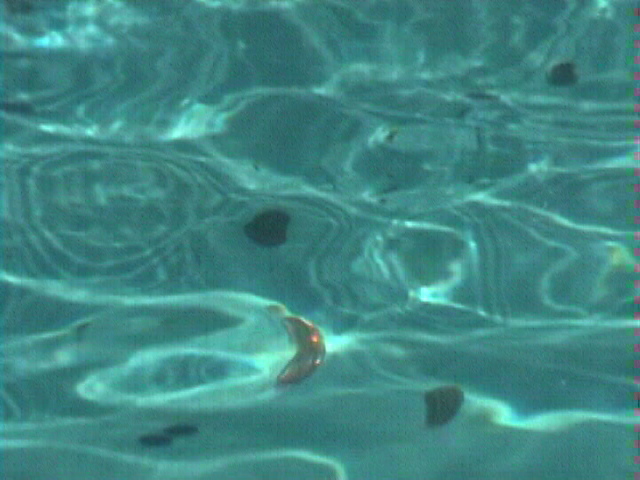
We decided to raytrace caustics through a pool of water.
Although we had originally submitted with optional project additives of
either particle interaction/splash or shading a duck (suggested by Pat),
we finally decided to tackle the volume rendering of participating medium,
with the vision of a final rendering to include both the caustics on the
floor of our water body as well as our scatter light in the medium.
For the project proposal, click here
Michael's Project Responsibilities
My responsibilities included but were not limited to the following:
+ Writing the Photon Integrator
(non-volumetric)
o this is the second pass of a based on Henrik Jensen's method of two passes,
the first pass casts out the photons and the second collects photons after refracting
them through a transmitive surface, as well as doing the other raytracing. According
to Henrik's paper I also made the collection of photons adaptive to the amount
of
photons we expected. If we didn't grab enough then we enlarged the radius. One
speed-up
was made by determining if the next possible photon that could ever be grabbed
was
way too far away -- if this was so then we stopped the calculations and used
whatever
amount of photons we had collected thus far and proceeded to the next ray. There
are tons of variables as well as a surface dependency making it hard to know
what part
of the code should be changed.
+ Writing the Volume Photon
Map Generator (essentially pass one again only volumetric)
o this was done using an approach by Henrik Jensen of casting out a specified
number of photons only this time when they were refracted through a transmitive
material raymarching began. At this point based on some random conditions the
photon
is either absorbed, propagated through to the next march, or scattered and then
propagated
+ Writing the Photon Volume
Integrator (essentially pass two again only volumetric) it
be noted that debugging was absolutely horrendous dude to the fact that ray
marching
slows renders down exponentially..
- Modelling a real water simulation with MEL and Maya (see attached difficulty
section)
Difficulties:
** Modelling and Exporting **
Originally one of my major resposibilities had been the modelling of the
water surface using Maya; a surface that would guarantee us beautiful caustics.
Additionally, my plan was to model an animal to be placed in the water, as I
was not sure using someone else's model was ok. I had written wonderful .MEL
scripts to simulate a perturbed water surface with turbulence, this made it
only more difficult to export to a .RIB file, which was already a full-time
job.
In the end, we made the executive decision that my time was better spent on
something
more technical. Nader created a simple sinusoidal surface and we moved on from
there.
(I do however have some pretty images of a turtle I modelled).
** Volumetric Participating
Medium **
As stated earlier the vision we had in mind for our render involved two images.
One
from the top surface of the water close up showing off beautiful caustics; and
the other
from inside the water showing off both the volumetric scatterring of participating
medium
as well as the aforementioned caustics on the floor. The primary reason debuggin
this
completely sucked was because it made my renders slower than mollases pouring
uphill
in a blizzard of freezing temperature and downhill wind. Unfortunately, at the
time
that I wrote this the volume part of our project still does not yet work...
but I put
a lot of time into it... i only have one messed up picture showing the algorithm..
In that
picture the photon power is maxed out for debuggin purposes.

Another attempt:

Acknowledgements:
I would first like to thank God, not only because He helped
me through this -- but also
because it bothers Greg when people do this. Seriously there were some divinely
epiphinous
gems of knowledge whose origin could have only come from God. God allowed me
to live through
the agonizing sleepless nights of down-right sinful amounts of coding and pointless
sugar
and caffeine consuption.
I would like to thank the people of Krispy Kreme and Happy Doughnuts, who upon
seeing the
pain in my face from this project *DONATED* both doughnuts and coffee to my
cause. For
this reason I continue to advocate patronage to both places.
Next I would like
to thank Greg for sometimes helping and sometimes not... the epitome of
a great TA -- seriously, he's the best TA ever. And yes Greg, both God and the
people of
Krispy Kreme do rank higher on the list. C'mon.. i mean it *IS* God and Krispy
Kreme..
third chair is not so bad.
I would also like
to thank Pat for smacking me around in this class and for not cursing me
out when I asked stupid questions during office hours; like "huh?"
and "what is this
graphics stuff?"
Last but certainly
not least, Nader, my partner. It has been a painful, sleepless joy
working on this project with you. Thanks for putting up with me.
Nader's Project Responsibilities
Caustic photon map:
The class for this
generates the photon map for the given scene and stores it in a balanced kd-tree,
following Jensen's implementation. This class also serves as the interface to
the integrator, returning
a vector of photon-distance pairs within the specified passed in radius.
DAL (directional area lightsource):
This class served as an abstraction to the sun. Instead of simulating a spherical
light source many many
milesaway, an area above the scene is computed and is used as the sampling area
when generating the photonmap. The problem with this approach is that depending
on the size of the light source area and
its position, some photons will miss the scene, and some will not hit the top
surface (i.e. the water); this
occurs when the photons are shot at an angle with the the area light perpendicular
to the z-axis, for
example, or when the area light is tilted, respectively.
One way to eliminate wasted photons is to make
the area light source smaller than the projected area
top surface, and just zoom in to avoid seeing the
unlit parts. This was not implemented fully however, as our scenes only used
light shiny straight down.
KD-Tree:
This class does actually hold the photonmap, since that is found in the above.
Instead, this just provides
the facility to generate a balanced kd-tree given a linear
array of photons. This implementation balanced
the tree based on the median, along the largest dimension
at that level of the tree, again following
Jensen's implementation.
(Water generator: a very very simple sinusoidal wave generator)
Difficulties:
-Figuring out what to do with the light source ... i.e. how to position it for efficient photon sampling.Acknowledgements:
Pretty much the same as Mike's ... 'nough said.
Results
For a larger image showing the effects of not using enough triangles and/or not interpolating the normals, click here.
Collages of images generated along the way during debugging (click for higher resolution)
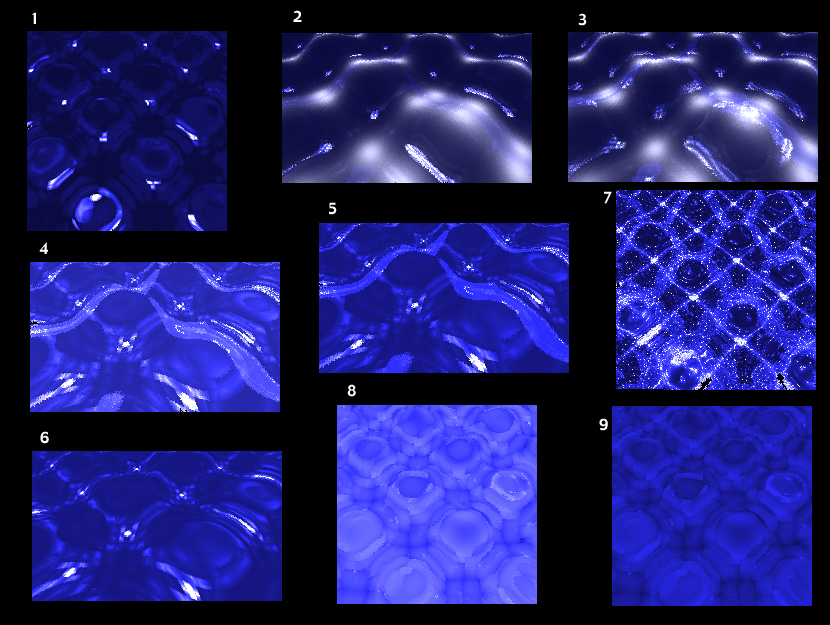
Collage Index:
1. A zoomed out view of the water surface
2. A water surface using a metalic floor
3. Same as (2) but using higher energy photons
4. Zoomed in view of the water surface
5. Same as (5) but weaker light source
6. Same as (6) but weaker reflection(?)
7. A wrong photon map implementation, but pretty
8. Same as (1) but using a stronger light source
9. Same as (8) but not as strong a light source
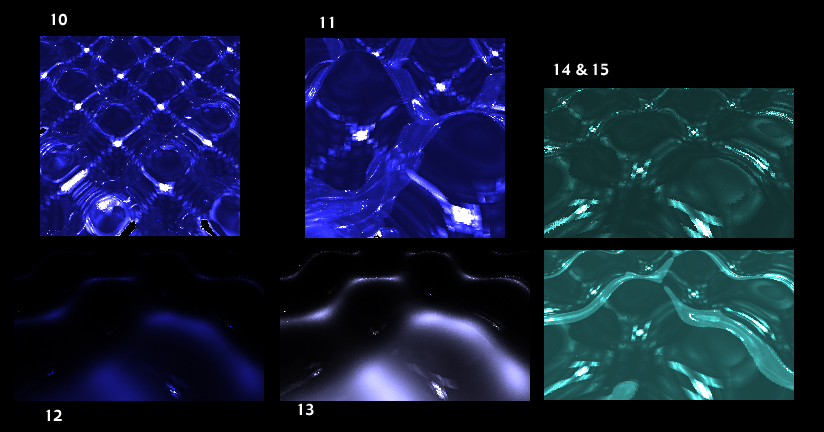
Collage Index (cont.):
10. We'er not sure about the parameters for this
11. Zoomed in view of (10)
12. Metal surface, weak refletion and photon power
13. Same as 12, but stronger reflection and photon power
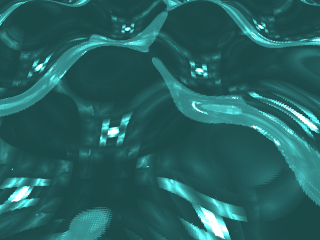
14&15. Weak and strong lighting of our final water rendering
Source Code: