Implementation:
Modeling Lava Flows with a Particle System
Creating Particles
Particles were generated at the top of the volcano. They were given
initial temperatures and velocities within the ranges specified by
the model file. This file could easily be modified to change the
behavior and characteristics of the lava.
The volcano was represented as a 2-D grid. For each square of the grid,
the volcano had a height and a temperature. Each particle is
associated with a grid square according to its location.
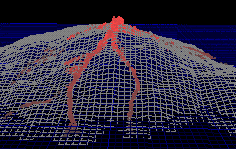
The squares of the volcano grid
Heat Transfer
We calculated heat transfer locally between particles within
each grid square. The particles transferred heat among themselves,
with the volcano surface, and with ocean water.
Particle Motion
Particle motion is affected by a number of factors. There are
both inter-particle forces (viscosity, repulsion, and attraction),
and external forces (gravity and friction).
- Viscosity
Viscosity causes nearby particles to trade some momentum, so that
they begin to travel more uniformly. The viscosity constant
increases as particles get cooler.
- Repulsion and Attraction
Repulsion keeps the particles from getting too close together, and
attraction keeps them from getting too far apart, so that the lava
is more fluid-like. This attraction and repulsion is actually
implemented by counting the density of particles in each square.
When the density becomes too high, particles start repelling each
other. When density becomes too low, particles become attracted to
other buckets that have a more desirable density. Although this model
is not as accurate as calculating particles individually, it is much
faster.
- Gravity
When particles are in the air, gravity accelerates them downward. Once
they are on the surface of the volcano, gravity pulls them along
the gradient of the surface.
- Friction
Friction dampens the speed of lava moving along the surface of the
volcano. When particles reach the ocean, another friction term
simulates water resistance, and slows the particle further.
Killing Particles
When the temperature of particles drops below a certain threshold,
they solidify and become part of the volcano. We then increase
the height of the volcano around the particle, and recycle the particle.
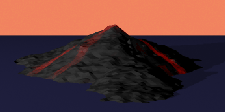
Building the Volcano
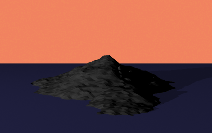
As the lava particles solidify, they contribute to the growth of the
volcano. Here we show a volcano
both before an eruption and after the lava has been flowing for 1000
frames. You can see how the volcano has gotten larger, growing in
the directions that the lava flowed.
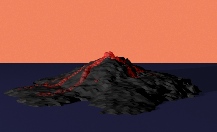
It's interesting to note that, on the right side of the volcano, the
lava built up at a rather steep angle, while on the left side, the
lava created a rather flat shelf. This is a result of the varying
slopes of the initial volcano. Steep slopes on the right cause the
lava to plunge straight into the ocean, cooling quickly and then
building upward. The gentler slopes of the left side allow the
lava to spread out more before reaching the water and solidifying.
Rendering the Lava
The lava particles are rendered as polygonal approximations to spheres.
They have the same specular and diffuse properties as the solid
rock, but they have an additional emissive glow that increases with
temperature. We implemented this glow by increasing the ambient
light term for the lava.
In this frame from the movie, you can see how the lava on the left
side of the volcano has a more grayish appearance
(especially the colder lava, near the ocean), while the lava in
the shadows appears more reddish. This effect can also be seen in
comparison of the two real-world pictures on our project's front
page.
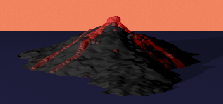
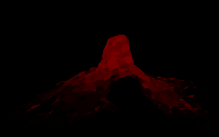
At night, the lava's glow is often bright enough to illuminate some
of the rock around the flow. To simulate this effect, we added an
additional ambient term to the volcano for squares that had hot
lava nearby. This effect can best be seen if we render only the
volcano, and not the particles:
Changing the Lava Parameters
The parameters of our lava are specified by a text file. By changing
just a few of the characteristics, we can get variations in the lava
behavior. For example, if we add more initial upward velocity,
increase the number of particles generated per frame, and decrease the
attraction between particles, we can get a lava fountain that spreads
out rather than forming narrow flows. Just by changing these three
parameters, we get:
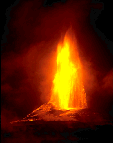
Simulated lava fountain versus Real-life lava fountain
Back to the lava page. 


