Scanning with the Cyberware Portrait Scanner

This page describes how to perform scans with the Cyberware Portrait Scanner (model 3030 PS).

Organization

Prepare the scanning area

  1. Turn off all lights in the graphics lab and hallways.
    Extra lighting from the lab and the hallway will cast shadows on your subject. You can turn off most of the hallway lights with switches near the entrance to the B-wing. Incandescent lights are particularly bad, because the range camera is sensitive to a small band of red light near 632.8 nm, the HeNe laser wavelength. Incandescent light has plenty of red in it and may cause range errors. The fluorescent light on the scanner box does not cause range errors, because it has very little red light in its spectrum.

  2. Clear the area.
    Make sure that the area around the scanner is clear of obstacles. Keep people and objects outside of the octagon of masking tape on the floor.

  3. Position the chair.
    If a chair is not in place, put it on the platform. Have it face the Mac/PC room, and position its feet to cover the four pieces of masking tape on the platform. Be sure to use a conference chair rather than an office chair with wheels.

  4. Turn on the scanner's fluorescent lights.
    The switch is on top of the scanner box.

  5. Raise the scanner box.
    Lift the scanner box to a high position, giving enough clearance for your subject to sit in the chair. The scanner box has a large horizontal lever that holds it in place. Push this lever toward the scanning platform, and push the scanner head up.

Prepare the scanning software

  1. Log onto skot (either remotely or locally).
    The scanner is attached to skot's SCSI port. For best results, do the scan on skot, but do all subsequent processing and visualization on a Reality Engine. Lambert is ideal.

  2. Make a directory for the scan.
    We have currently set up a root directory for the purpose of storing Cyberware head scans:

        /usr/graphics/project/cyberheads
    

    At the moment, I have subdirectories organized by geographical regions on this floor of the building, "gates3a" and "gates3b". We also have a subdirectory called "friends" for people who do not fit into an obvious category. You should choose one of these subdirectories and make a another subdirectory for your subject. For example, when scanning Eric Veach, I made a directory:

        /usr/graphics/project/cyberheads/gates3b/veach
    

    When scanning my girlfriend (Jelena), I made a subdirectory:

        /usr/graphics/project/cyberheads/friends/curless/jelena
    

  3. Start "echo".
    The Cyberware scanning program is called echo, but it invoked by typing "ee". If you do not have /usr/graphics/bin in your path, you will need to type "/usr/graphics/bin/ee".

Prepare your subject

  1. Have your subject sit in the chair.

  2. If she's wearing glasses, have her remove them.

  3. Tuck away loose hair.
    Stray hairs will be imaged and will yield crummy geometry.

  4. Watch the feet.
    If your subject has long legs, make sure her feet are not sticking out far beyond the octagonal platform; she may need to tuck them under the chair.

  5. Position the scanner box.
    Move the scanner box so that the top of the opening of the scanner box is about level with the top of the subject's head. Use the same lever as used earlier.

  6. Tell her about what's about to happen.
    At this point, you should prepare your subject in words for the scanning process. For example:

    "The scanner box will circle around you, and the laser sheet will cross your face. The laser is low intensity and will sweep past you quickly, so it will not harm your eyes. You may (and ought to) blink up until the moment the box comes into your peripheral vision (on your left). Then, keep your eyes open without blinking until the laser passes to your right. The box will tend to draw your eyes to the right as it passes. Do your best to stare straight ahead; tracking your eyes to the left, if possible."

  7. Position the subject's head.
    Using the pointer as a guide:

    It's important to center your subject's head well so that later operations (namely, filling the top of the head) will give desirable results.

Perform the scan

  1. Last words.
    Tell your subject that the scan is about to begin and to remain as still as possible. Remind her to keep her eyes open when the laser passes over her face. Also tell her that you will let her know when the scan is finished.

  2. Begin the scan.
    To begin the scan, type "im" (short for image) at the echo prompt:

        3030RGB/PS #102> im
    

    The scan takes about 20 seconds. When the scanning arm stops its clockwise progress, the scan is finished.

  3. Exit the platform.
    Tell your subject that the scan is over and that she should lean forward and step off the platform. The scanner arm will move in a full circle (counter-clockwise) to "unwind".

Cleaning up the model

  1. Save the model.
    At the echo prompt:

        3030RGB/PS #102> save <name>
    

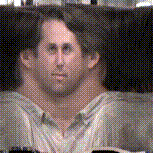
    This generates two files: a Cyberware geometry file ("name") and an IRIS image file ("name.color"). The image file is the textrue map of your subject's head. Later processing steps will generate a version of this file rotated by 90 degrees. An example of this appears at the beginning of this document.

    If you have access to a Reality Engine, go to this machine, and change to the directory where you saved the data. Start echo and load the data:

        3030RGB/PS #102> fetch <name>
    

  2. Fill some gaps in the model.
    Start by filling many of the gaps in the data:

        3030RGB/PS #102> fill -i
    

  3. Display the data.

        3030RGB/PS #102> di
    

    This launches a viewer that is a bit cumbersome to use, but provides needed functionality. I leave it to you to figure out how it works. Use the right mouse button for pull-down menus. The left window is a wireframe view, and the right window is a full rendering.

  4. Toupee!
    You'll need to fill the top of the model's head:

    1. Within the viewer's right (bigger) window, choose "meter points" from the right-button pull-down menu. A red cross hair appears when you're on top of the rendering.

    2. Move the mouse around until the cross-hair is near the top of the head. It takes some effort.

    3. Read off the "latitude" (LT) from the small window on the left. Add 30 to this number and memorize the result (!).

    4. Exit the viewer using the pull-down menu.

    5. Fill the top of the head with the "toupee" function:

          3030RGB/PS #102> toupee <latitude>
      

      This will fit a parabola to the top of the model's head. The latitude must be a number less than 512. If the toupee needs tp be higher, then you must reaise the scanner box and rescan your subject.

    6. Redisplay the model. Rotate the head to the side and see if you've made the head to pointy or too flat. To do this, rotate the wireframe rendering and then redraw the full rendering. If the toupee is too high, you may also notice a white area on the top of the head. This means that walls and lights seen above the subject's head are being mapped onto the top of the model. This is another indication that you need to lower the toupee.

      If the head is too pointy or flat, you need to choose a different latitude for the toupee program. You will have to reload the model and try again:

          3030RGB/PS #102> clear
          3030RGB/PS #102> fetch <name>
          3030RGB/PS #102> fill -i
          3030RGB/PS #102> toupee <latitude>
          3030RGB/PS #102> di
      

  5. Save the model.
    When you're satisfied with the result, save the model. I usually add on the suffix "_ed" (as in "curless_ed") to avoid overwriting the original, in the event that I want to do a better toupee later. If you're happy with the model, please clean up and remove the original data. To save the model:

        3030RGB/PS #102> save <edited-model-name>
    

  6. Exit echo. Your model is now ready for a better viewer! So, quit echo:

        3030RGB/PS #102> quit
    

Viewing the model

We currently have two viewers that read Cyberware files: plyview and gedecimate . Plyview is a simple multi-resolution viewer I wrote for looking at large triangle mesh datasets. Gedecimate is a mesh decimation program written by William Schroeder and Bill Lorensen .

To start plyview, type "plyview" (or "/usr/graphics/bin/plyview").

To load the model, type (at the prompt):

    plyview> readcyb <edited-model-name> -head

Be sure to load the file you created after editing the original data. In the process of loading the file, plyview will create an image, ".rgb", that represents a cylindrical color map of the subject's head. Be sure to take a look at this. It's weird!

For more on interacting with plyview, check out the web page .

To load in a model with gedecimate, you first need to source a configuration file for the Lymb system:

    shell> source /usr/graphics/bin/lymb_setup

Then type "gedecimate" or "/usr/graphics/bin/gedecimate".

You can load the model in the obvious way with the pull-menus. It will immediately start decimating unless you tell it not to beforehand. See the web page on gedecimate for more details.

Converting to other formats

You can get a Cyberware file into ply format by viewing it with plyview and then saving it with the command:

    writeply <name> <name.ply>

The first argument refers to the name of the mesh inside of plyview. This name is the same as the name of the Cyberware file you loaded in. The second argument is the name of the ply file that will be generated. In addition to <name.ply>, plyview will generate <name_res2.ply>, <name_res3.ply>, and <name_res4.ply>. These extra files are progressively lower resolution versions of the highest resolution file.

You can convert Cyberware files to Inventor format with the "cytoiv" command. Type "cytoiv" or "/usr/graphics/bin/cytoiv" to get a short description of how to use this utility. For scans of heads, you'll want to set the option "-maxlen 100" to ensure that all possible triangles are created. If you want to use the texture map, you'll need to provide the "-tex <name.rgb>" option. Note that this texture file must be the same one created when you first use plyview on a Cyberware file.

Through gedecimate, you can save to more formats. I'm not certain how many of these formats include textures - you would have to ask Bill about that.

Creating an MPEG sequence

One fairly straightforward way to create an MPEG sequence is to render and store a series of frames within plyview, and then convert the frames to an MPEG file. Click here for more details.