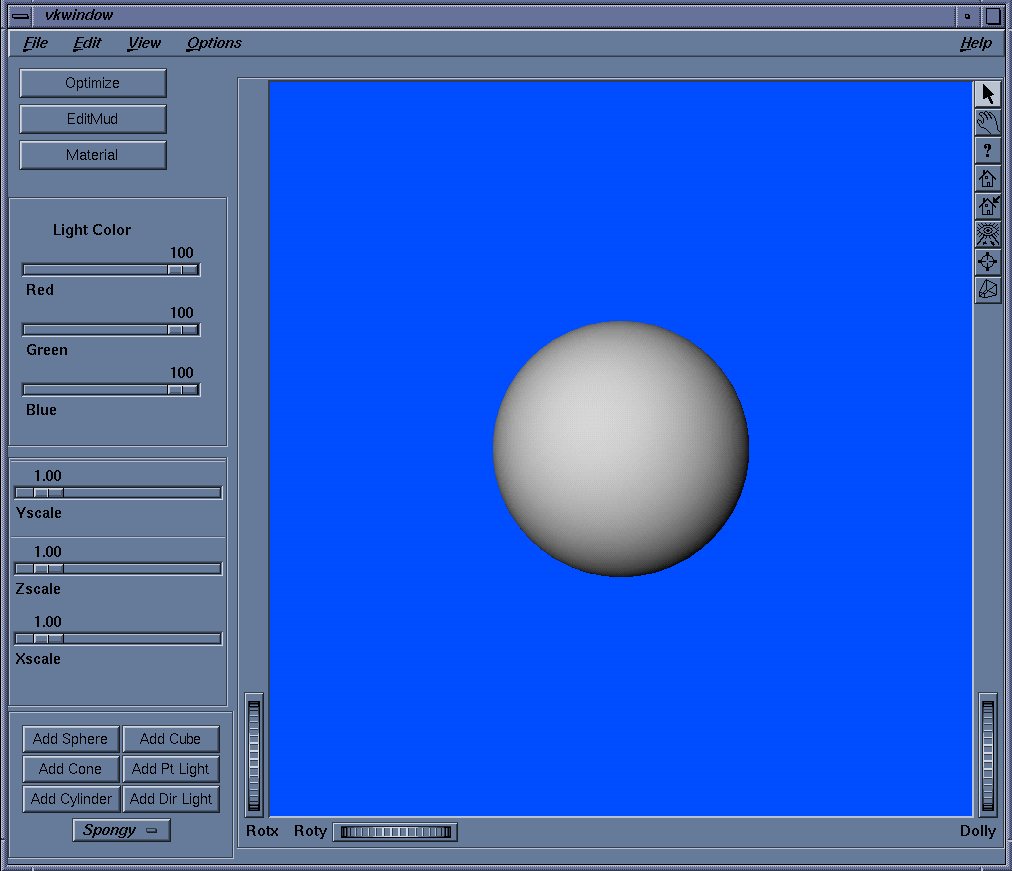
This window is used to add objects to the scene, manipulate them in the scene, and modify color and light attributes of the objects. The bottom right contains buttons that can be used to add objects. You can add spheres, cubes, and cylinders. You can also add point lights and directional lights to the scene. There is a combo box that can be used to select the type of material in the object; either doughy or spongy material. Spongy material tries to stretch when any stress is applied to it. The length of the edges of each triangle is maintained, so the triangles move. Dough is much stiffer and bends only as much as necessary to the applied force. Edge length is not kept constant, so a force applied to the shape moves vertices and increases the length of the edges of the triangles.
When an object is added to the scene, it appears in the middle of the screen. Drag with the middle mouse button to move the object around the scene. Drag with the right mouse button to rotate the object. Clicking with the middle button will make the object blink red - this indicates that it is the selected object. Objects must be selected via the middle mouse button before they can be edited or any of their attributes changed.
Several things can be done to a modify the attributes of the selected object. The light color scales will modify the emitted color of a light. The Xscale, Yscale, and Zscale scales will stretch or compress the object in the indicated dimension. Dragging with the right button over a selected shape will allow the user to rotate it.
The Material button will modify the material attributes of the selected object. It will open up a dialog box that allows one to change the color, reflectivity, and various other material attributes. The Optimize button will scan the selected shape and remove unnecessary or redundant vertices. This can be run more than once, but should not be run too often to avoid deforming the shape.
You can paint objects by hitting 'p'. After you do this, clicking the middle button will paint triangles on a shape. The color of the paint is the current light color. Hit 'n' to go back to regular object selecting mode.
An object can be texture mapped by selecting it with the middle button and selecting TextureMap from the File menu. This opens up a file dialog box that allows you to select the .rgb file to texturemap with. After clicking OK, the current shape will have a bitmap texture projected onto it. The texturemap stays with the object even when it is modified.
The EditMud button will open the next part of the program, the Mud Editing window:
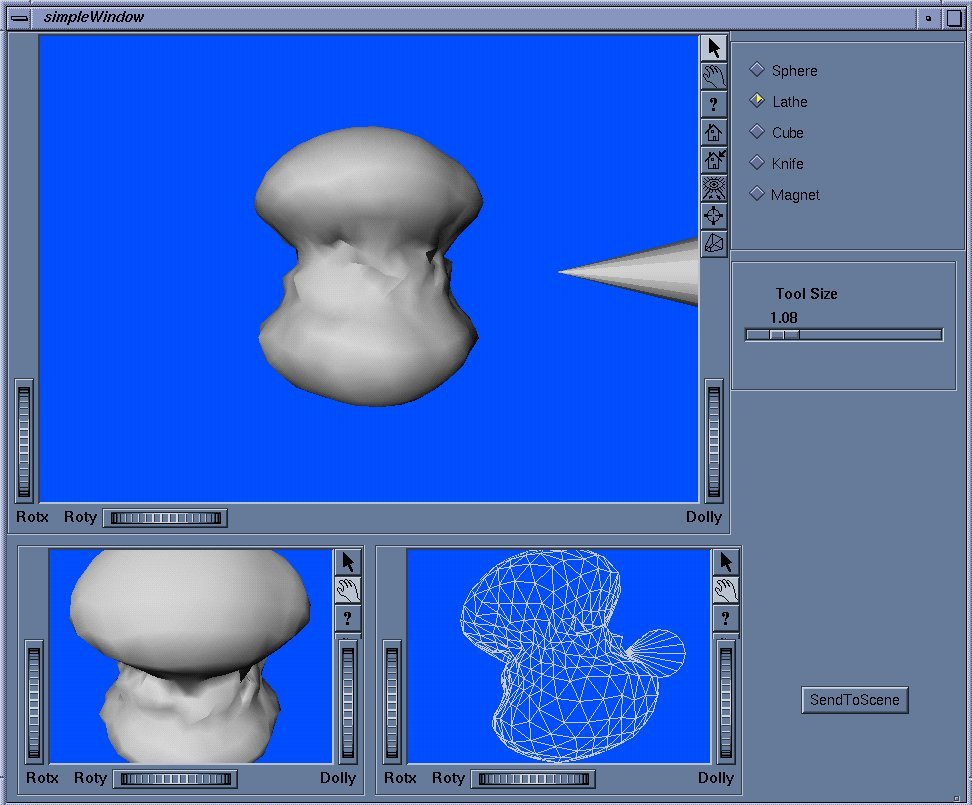
The top window contains the object that is being edited; this is where all the editing takes place. The two bottom windows are views onto this main window; they can be used to generate two independent views of the object. Ctrl-Right Click on these small windows will give a popup menu of options for displaying this view. One of these options is to generate a wireframe, as can be seen in the lower right window of the above screenshot.
The upper right contains the available tools. Select the tool by clicking on the radio button. Not all tools are implemented. Drag in the main window to manipulate the tool. The toolsize scale allows the user to change the size of the tool.
The SendToScene button closes the window and updates the main scene window. Use this to leave the shape editor; closing the window manually is a bad idea.
Saving and loading is supported via menu options in the main scene editor. Output is to a TSD file. Special options are added in comment fields to allow VRMud to read a scene back in correctly. This output TSD file can be sent to a raytracer. All shapes and lights are output to the .tsd file.
All windows contain tools for scrolling and zooming around the view space. All windows support the Ctrl-Right Click pop-up menu for viewing options.