Here we have some vector artwork which shows a green polygon in front of a yellow background. If we simply converted this into a standard texture using the quantization indicated we would get something that would not really capture the sharp edges of the polygon: we can either perform nearest-neighbor sampling of this original artwork to get a pixelated texture or we can perform filtering when we downsample to get a fuzzy (but antialiased) texture. Neither one of them would magnify properly, however.
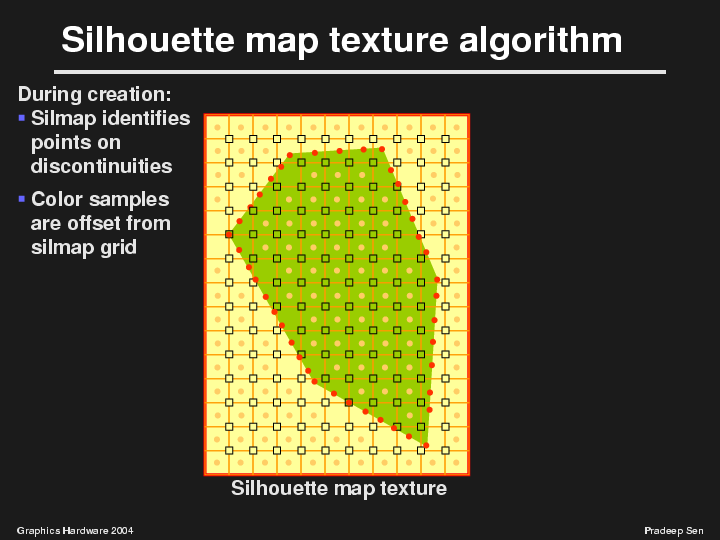
Silhouette maps, on the other hand, will correctly capture the necessary detail. Here, the red dots indicate silhouette points on the discontinuity and the orange-pink dots are the default points that have been placed in the middle of each cell. The orange squares show the cells of the silhouette map, and the squares on the corners of the cells indicate the RGB color samples.