Rendering an Ice Cube
- For our project, we decided to work on two main aspects of the ice: creating a surface that would realistically reflect and transmit light similar to a real ice cube and to generate bubbles in the center.
Preliminary Steps
- Instead of squinting at small pictures of ice on our computer monitors, we decided to take a hands-on approach and actually make some ice. The following are pictures taken of this piece of ice.
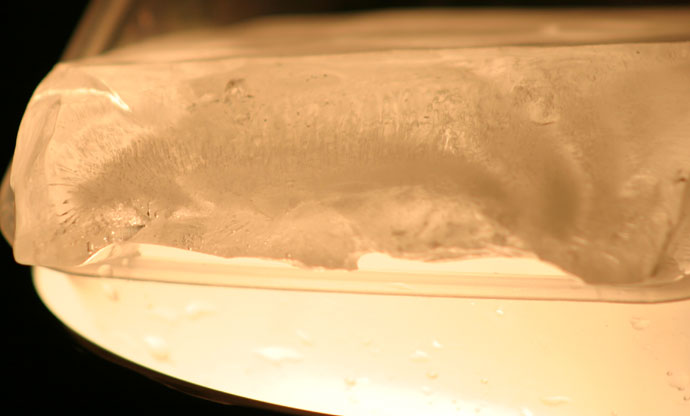
- We noticed two things. First off, ice is usually classified as having a glistening, specular surface. However, this is mainly because of the water that has melted on the surface of the ice. Therefore, the surface of the ice would have a perfectly specular surface except for the roughness creating little microfacets where light would reflect. Ice with a dry surface, we decided, has more of a diffuse surface. The cloud in the center consists of a wide range of bubbles. The ones in the center are incredibly small, creating the cloud-like appearance. As we get farther from the center cloud, the bubbles become larger and more defined. We also noticed that among the bubbles were thin, cone-like shapes which we interpreted to be air pockets left from traveling air bubbles. Unfortunately, we were only able to model the bubbles for our final project.
Defining the Surface
We found the index of refraction for ice to be 1.31. Using that, we created a fresnel dielectric to calculate the amount of light reflected and transmitted. To create the model of a diffuse ice surface underneath with a perfectly specular surface on top, we used the FresnelBlend BxDF. The FresnelBlend uses a microfacet distribution, so we included a Blinn microfacet distribution. As we found out later, this helped bump-map realistic-looking fine detailed onto the surface. We also created a bump-mapped surface. Since the finer perturbations were supplied by the microfacet distribution, we simply added on a texture that had large, very slight dips in the surface to give an overall rough feeling to the ice. Using this ice material class, we created the following pictures of a cube.
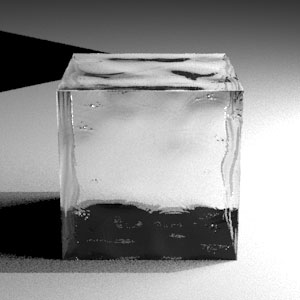
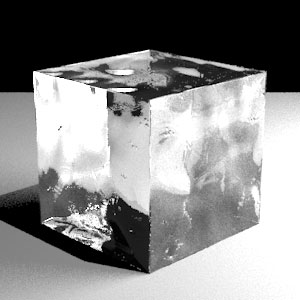
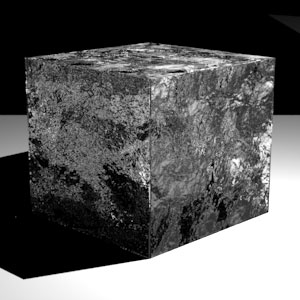
- We also experimented with other types of bump-mapping, specifically fBm noise because it supplied the roughness that we thought would be most appropriate. However, it perturbed the light refraction too much, and we were afraid that it would later cause the viewer to lose sight of the bubbles inside, so we ended up sticking with our original bump-mapping.
Generating a Bubble Distribution
- Initially, we wanted to make arbitrary objects out of ice, but in the end, we found it better just to concentrate on a cube. For a general shape, it is a hard problem to place bubble at the “center” of the object. Our solution was to pick two points on the object, trace a ray through it, finding the intersection interval and then adding a bubble along that interval according to a probability distribution.
We chose the following: an x4 curve, followed by a uniform distribution, then another x4 curve. This way, we always generate bubbles inside the object, and on average, as close to our distribution as possible. Our rational was the following: the “cloud” of bubbles in the middle seemed to be saturated so much that the bubbles are of a constant density. We wanted the bubbles to drop off very quickly as it approaches the edge. x4 produced the best results empirically.

Our bubble generator is implemented in pbrt as icegenerator.cpp, which creates the bubbles and then writes it out in Preprocess function. This way, we had access to the complex objects that we (thought) were going to make up our scene. We sampled points on the surface of the scene by randomly sampling over the triangles that made up the scene.
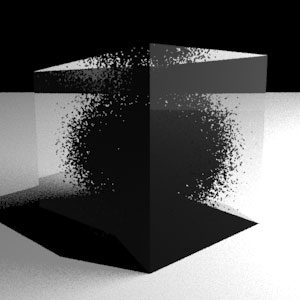
Upload new attachment "bubbles_large.jpg"
Placing the Bubbles in the Ice
- At first, when we placed spheres in the ice, they just turned out black. So we tried assigning them to be of the same ice material as the block. This turned out pretty well, since bubbles look somewhat like ice spheres. Here’s a rendered image with only a few bubbles.
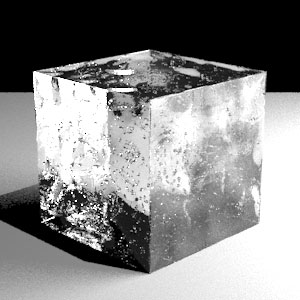
Here is the image with all of the bubbles from our distribution.
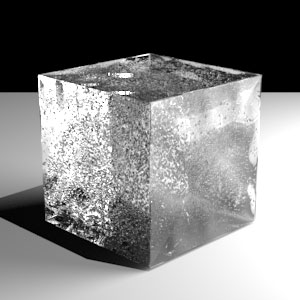
This is a close up of the bubbles. You can see how bubble-like they look as spheres.
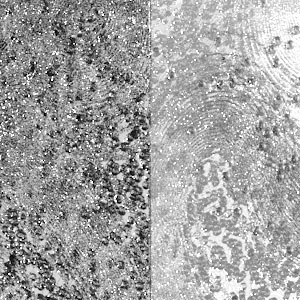
Creating a More Ice-Cube-like Cube
- Our next task was to create an ice cube that wasn’t so cube-like. We wanted to melt the edges, but, for efficiency purposes, roughen up the sides simply by bump-mapping. Our first approach was to create a box in 3D Studio Max. We then tessellated the box and softened the entire shape. Then we exported the box as an object file and wrote a parser to convert it into the correct setup for a pbrt file. Several problems arose from using the box instead of a cube. First off, the faces were broken down into several smaller primitives, and bump mapping became very condensed, creating the look of hundreds of deep holes all over the ice cube. Removing the bump mapping made the ice too smooth, plus the light didn’t travel through very well.
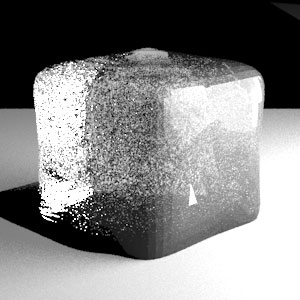
We fiddled around with 3D Studio Max some more to find a way to preserve the faces on a box while softening only the edges. They were exported separately. This time bump mapping was only applied to the faces. This worked out much better, as we got the following image.
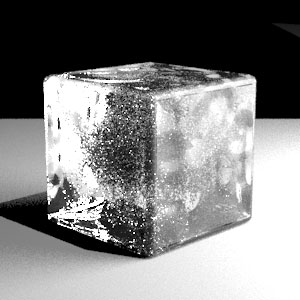
We added in caustics because ice, like glass, tends to concentrate light in certain regions. We made use of the photon map and got the following image:
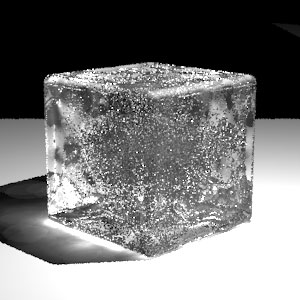
Photon mapping is an extremely expensive process, and both the number of initial photons shot and the sample makes a huge difference. We had limited time, but many computers that we could utilize, so we ended up modifying photon map to generate the photons, then write it out to disk. We then made use of the “clipwindow” functionality of the film class to render each section of the image separately. This cut down our total rendering time to 1 hour instead of over 5 (for images of 1000x1000 pixels).
Redefining the Bubbles
- The last task we tackled was in the bubbles. Instead of creating a white cloud in the center of the cube, the bubbles were dark and speckled. We first tried to fix this by adjusting the index of refraction so that light going through a bubble would refract as if it were going from ice to air instead of air to ice. However, this didn’t change the appearance very much, so we decided to give the bubbles a slightly stronger diffuse reflection. As first we tried out a Lambertian diffuse model, but it was too strong, causing the center to glow.
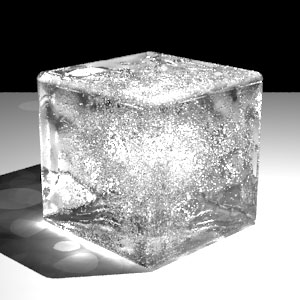
What ended up working the best was to have a fresnelblend similar to the one that we implemented before, only with a stronger diffuse, allowing the same refraction and reflective properties, but with stronger diffuse coefficients. We adjusted the values by hand and got the following image.
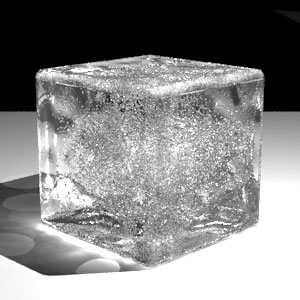
Final Results
- We then rendered our on a large scale. Here is the final image we submitted for the competition.
Upload new attachment "lighting_final.jpg"
And here is another one rendered with more photons.
Upload new attachment "lighting_caustics.jpg"
Between us, Yi Lang worked on the bubble generation and caustics. Joyce worked on defining the BxDF of the surface (and the bubbles), bump mapping, and creating the ice cube geometry.
Conclusions
- Overall, the image turned out better than we expected. A few things we would’ve done if we had more time was find a way to define bubble radius so that bubbles were smaller in the cloud and larger towards the surface. We also would’ve made those cone-like air pockets and found a way to smooth the edges of the cube without having so many lines present. Other things we were considering were putting lots of ice cubes together, or putting things into or behind the ice and see how the cube distorts the image.
Source Files: source_files