CS178 Assignment 1 - Bad Photos
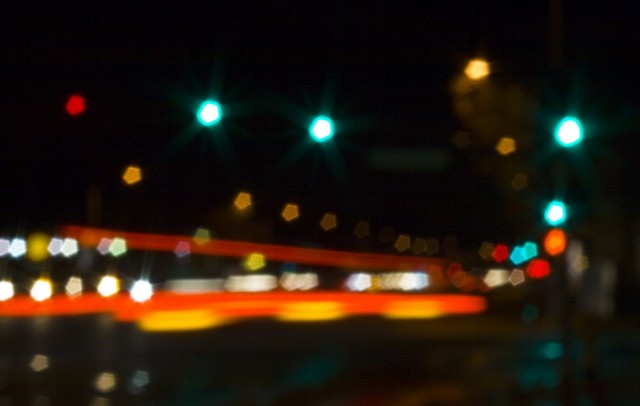
Traffic Lights at the Corner of Matadero Ave and El Camino Real. Photo by Andrew Adams
Motivation
Cameras in automatic mode try to take care of the technical aspect of photography for you, and just let you frame the scene and shoot. They will attempt to make sure the scene is not too dark, not too bright, not blurry, and so on. These goals don't always match up with the photographer's intent. For this first assignment, you'll be playing with the settings on your camera to produce photos you can't easily produce in automatic mode. You'll be taking photos that your camera might consider "bad" in some technical way, but are nonetheless interesting to look at, and even artistic.
For this assignment, you'll also be setting up the online photo album and familiarizing yourself with our peer grading system that you'll use throughout the course to both submit your work for grading, and to share your work with your fellow students.
Instructions
- Take some photos that meet the requirements listed below.
Each photograph you upload should meet at least one of the requirements below, and you should make sure to cover every requirement with at least one photo. You should upload at least five photographs for the assignment, but no more than ten. While a photo can fulfill more than one requirement, you will need to select exactly one requirement for each photo, which will be used for grading. Note that these general rules apply to this assignment and all subsequent photo assignments in this course.
Now, for Assignment 1 specifically: remember, even though the photos you take are supposed to be technically "bad" in some sense, we want you to create things that are interesting to look at. The "badness" should be intentional for an artistic purpose.
- Requirement 1: At least one photo must be poorly exposed. That is, most of the image should be either very close to black (underexposed) or close to flat white due to oversaturation (overexposed).
- Requirement 2: The main subject of at least one photograph should be motion-blurred, either due to movement of the subject or movement of the camera.
- Requirement 3: In at least one photo, nothing at all should be in focus. It's hard to take a good looking photo where nothing is in focus - be creative!
- Requirement 4: You should use the wrong white balance setting for some intentional effect in at least one photo. The white balance setting on a camera tells the camera what color it should expect the scene illumination to be, for example daylight (which is bluish) or indoor incandescent (which is reddish). Most cameras have an "auto white balance (AWB)" setting, and manual settings for these other illumination types. You don't need to understand white balance in detail to fulfill this requirement. It's a subject we'll cover in detail later in the course.
- Requirement 5: At least one photo should be poorly composed. Scan through Chapter 12 of your textbook, and search on Google for "rules of composition". Read about them, and then intentionally break a few. If you're not sure what to do you may want to consider an exactly centered subject that produces an oddly symmetric photo, a confusion between the subject and a background object, or a horizon that isn't level.
- Follow these detailed instructions to set up your Google account, upload your assignment to Google+ as an album titled "CS178 Assignment 1 - Bad Photos", and submit it on the peer grading system (Vela).
If you're having trouble, come by office hours and we'll help you get started.
Example Solution
We've posted an example solution to this assignment to let you know what we expect. Please note that your comments should be entered in the peer grading system (Vela), and not just as comments in Google+ (despite the way it's done in the sample solution). For additional inspiration, you may want to peruse the best CS178 photographs (as selected by the TA's and instructor) from 2009, 2010, 2011, 2012, and 2013. However, you do not need to meet the assignment requirements in the same way as these solutions do - in fact, you should challenge yourself to come up with creative, unique compositions. There are plenty of possibilities out there. Surprise us!Also, please remember that the photographs that you submit for each assignment must be taken by you specifically for this course. Do not reuse old photographs that you may have laying around, even if they perfectly meet one of the requirements!
If you have questions or comments about the photos we used in the example solution, feel free to add them as comments below the corresponding photograph in Picasa Web, or to email us.
Peer-to-Peer Grading
New last year, we started experimenting with a peer-to-peer grading system for the weekly photographic assignments. On the Tuesday night following each assignment due date, you will be assigned to review the assignments of a few classmates. Along with the TAs, you will assign a technical score and a style score to each photo, as well as write some comments or a critique. Your assigned reviews will appear on your home screen in the peer grading system. These scores and reviews will be due on the next Sunday night at 11:59pm.
For each photo, you should already be familiar with the requirements, having done the assignment yourself; if you are confused, you should ask one of the TAs or post on Piazza for clarification. Your task is to determine whether or not the photo you are reviewing meets the requirement and assign a grade based on the following rubric:
- Check +: The photo meets the requirement in a particularly interesting or clever way. This score should be used sparingly; a photo must really deserve a check +.
- Check: The photo meets the requirement. Most photos will receive this score.
- Check -: The photo attempts to meet the requirement, but doesn't. For example, if a photo for requirement 3 is mostly out of focus, but has something in focus, the photo should receive a check -.
- Zero: The photo is not related at all to the requirement, or the photo is missing a description.
You will also need to assign a style score for each photo. This score is slightly more subjective, but the goal is to evaluate the quality of the photo. Your task is to assign a grade based on the following rubric:
- Check +: The photo is spectacular and makes the grader's jaw drop. This score should be used sparingly; a photo must really deserve a check +.
- Check: The photo is well taken and adheres to basic photography principles. Most photos will receive this score.
- Check -: The photo is poorly taken, or it is clear that very little effort went into taking the shot. Basic photography principles from the course have not been applied, or artistic deviations have not been justified in the photo description.
Finally, you should add some comments and a critique for each photo. We will talk more about this in the first section meeting.
Practice Problems
To help you with exams, we are giving out practice questions at the end of each assignment. You do not have to turn in the answers for these; they are purely for your own learning benefit. The correct answers will be revealed here in bold after the assignment deadline.
Update: Answers have now been marked in bold.- Problem 1a. True or False? If camera apertures were square instead of circular, then F numbers will be separated by factors of 2 instead of sqrt(2).
- Problem 1b. True or False? In aperture priority mode, if you lower the F-number, the image gets brighter.
- Problem 1c. True or False? In-lens leaf shutters expose the
center of the field of view longer than the corners.
- Problem 2. Which of the following statements are true about
pinhole photographs? Assume the surface on which the image is formed
is flat. Circle all that apply.
- (a) They are linear perspectives.
- (b) They have infinite depth of field.
- (c) Straight lines in the world can become curved in the photograph.
- (d) They are upside down, but if you rotate them 180 degrees they look correct.
- (e) They are upside down and if you rotate them they still read read backwards.
- (g) They are dim, unless the scene is very bright or you use a very long exposure.
- (h) They are in black and white.
- Problem 3. What is the minimum number of vanishing points
there can be in a linear perspective drawing of a cube? Assume the
cube is an open wire frame (or it's made of glass, so you can see all
12 edges regardless of your viewpoint). Assume also that the cube
measures 1 foot on a side, and you can't stand more than a few feet
away from it. Circle the best answer.
- (a) Zero
- (b) One
- (c) Two
- (d) Three
- (e) Infinitely many
- Problem 4. You're taking a picture of an athlete at f/2.8,
1/200s, and ISO 200. You realize that you want twice as much
depth of field and half as much motion blur. What new settings
do you use, if you want to keep the same amount of exposure?
- (a) f/4, 1/400s, ISO 200
- (b) f/4, 1/400s, ISO 400
- (c) f/4, 1/400s, ISO 800
- (d) f/5.6, 1/400s, ISO 800
- (e) f/5.6, 1/400s, ISO 1600
Due Date
Assignment Deadline: 11:59pm, Sunday, April 6, 2014Late Deadline: 11:59pm, Tuesday, April 8, 2014
Review Deadline: 11:59pm, Sunday, April 13, 2014
Assignments are generally due on Sunday at midnight at the end of the week in which they're assigned. This leaves you free to start thinking about the next assignment during your next section. Sometimes lateness is unavoidable, so familiarize yourself with the lateness policy in the course outline.
FAQ
Q: My Camera doesn't have manual focus. How can I force everything to be out of focus?
A: Even if your camera doesn't provide manual focus, you can usually force the focus to be anything you want. Just point at an object that's not in your scene but at the desired depth, press the shutter button halfway to autofocus on it, then with the button still half-pressed, swing around to aim at your scene and press the button fully. Does the exposure come out wrong when you do this? We'll talk in class about focus-lock and exposure-lock functions, which not all cameras have.
Q: At what resolution should I upload my photos?
A: Google resizes your photos for viewing, and gives you 1GB of free storage. This should be enough that you can safely upload full resolution images for the course. If you're worried about running out of space, you could also resize your images in Photoshop, Picasa, or a similar program before upload to something smaller.
Q: Are we allowed to edit our photos in Photoshop before uploading? How much editing is acceptable? Do we have to say what we did?
A: In general, most requirements won't necessitate any image manipulation in Photoshop, and for this first assignment, none of them do. However, some requirements for future assignments will specifically involve image editing, and even for those that don't, you're always welcome to process your images in Photoshop or any other program. Just keep in mind that if you do edit your photos in Photoshop, you should definitely state what you did in the comments. For example, you might say: "I used Photoshop to increase the saturation and darken the sky". Finally, keep in mind that Photoshop should not be used as a substitute for proper use of your camera or for faking a requirement. For example, for this assignment your underexposed or overexposed photo must be that way from the camera -- you're not supposed to just take a normal photo and use Photoshop to make it way darker or brighter.
© 2009-2014 Marc Levoy, Andrew Adams, and Jesse Levinson