Introduction and Motivation
The purpose of this project was to examine image-based lighting, as explained in Paul Debevec's Siggraph 1998 paper entitled Rendering Synthetic Objects into Real Scenes. Image-based lighting is becoming increasingly important in the film industry as it provides a practical means of seamlessly integrating 3D objects into an existing 2D image.
Having worked in the video and film post-production industry for a couple of years, my primary goal was to explore the image-based lighting pipeline, from data acquistion to creating the final composited images.
My initial project proposal can be found here.
Task Breakdown
My work was roughly broken down into the following tasks (click on the links for more details and pictures):
- Data Acqusition: To be able to do image-based lighting, I first needed a high dynamic range image of the area I intended to enhance with my 3D object. In my case, this was obtained by photographing a mirrored ball at multiple exposures.
- Computing the Radiance Map: Once I had photographs of the light probe, my next task was computing a radiance map from this data. Fortunately, Paul Debevec has a very well written paper on this subject, Recovering High Dynamic Range Radiance Maps from Photographs, from which I implemented a tool. The tool takes as input a series of light probe images and creates a high-dynamic range image and radiance map from them. It also acts as a high-dynamic range image viewer. When computing the radiance map, the light probe is assumed to be small relative to the environment and camera. The data on the spherical light probe is saved into a 2D map referenced by latitute/longitude. Bilinear interpolation was applied where appropriate. The tool also uses code from Numerical Recipes in C to do singular value decomposition.
- Camera Calibration: The next step was to build a 3D representation of my scene. As I did not have access to any sort of sophisticated modeling software, I stuck with a simple geometric plane in a perspective view. I had rough measurements of the camera position and angle; then, I wrote a simple OpenGL utility that allowed me to input the various parameters and interactively adjust them until I had a reasonably good approximation of the perspective and object parameters. The output of this tool was a RIB file that could be directly rendered using lrt.
- Colour Calibration: For optimal compositing results, the colour of the local scene objects should be matched as closely as possible to the original photograph. In his paper, Paul Debevec outlined a method whereby the colours can be computed by comparing the output of a rendered image with the original image. Again, I wrote a simple tool that takes as input a RIB file, an image of that RIB rendered by lrt, and the original image. The output is an updated RIB file. This process can be repeated until the colour matches the original image, although it is rare that more than one or two iterations are required, depending on how far off the initial estimate was.
- Rendering the 3D Scene: I wrote a couple of new lrt modules to create the necessary renderings for the final compositing step. The first module, globalillum, is a new integrator that uses the radiance map computed from step 2 to light the scene. I assumed that the environment is large compared to the rendered scene, and thus only the direction is used in retrieving the radiance from the radiance map. Again, bilinear interpolation was applied where appropriate. Multiple importance sampling was required to reduce noise: the samples are generated using stratified sampling (via LatinHypercube) and then weighted using a combination of the probability distribution function and the brightness of the light in that direction. Irradiance caching is used to estimate indirect lighting effects. The second module I wrote was a trivial integrator that produces only the alpha channel of a scene. This image is required as a matte for the final compositing step.
- Image Compositing: The final step in this process is to composite the 3D image created by lrt onto the original photograph. To do this, I used Paul Debevec's differential rendering technique, which takes the difference between a rendered image with and without the new 3D objects and applies that to the original photograph. This technique results in a seamless integration of the 3D objects with the 2D scene without requiring an accurate representation of the objects that interact with the newly added ones.
Problems and Challenges
Here is a brief summary of the various technical hurdles I encountered:
- Equipment: I did not have access to any professional-grade tools for this project. For example, the camera I used for taking light probe images isa 3-year old Olympus D400 (ancient by today's standards). It offers very little in the way of manual control. In particular, there is no ability to manually set the shutter speed when taking pictures. Fortunately, the camera does allow limited control over an "exposure offset". I also had to disable the automatic white-colour balancing. The resulting data was somewhat noisy, but good enough for the purposes of this project.
- Recovering absolute colour: The algorithm for recovering high dynamic range data only produces relative curves. To recover exact colour information, one has to offset these curves based on intimate knowledge of the camera or various other colour calibration tools. The best I could do was to photograph some really white paper and take that as RGB=(1,1,1).
- Noisy renderings: My initial renderings turned out to be incredibly noisy, even when sampling a high (3000+) number of directions for each sample point. This turned out to have multiple causes. First, because I could not recover the entire dynamic range of the image, I had to estimate the values for which I had no data for. Second, I had to add multiple importance sampling to put more weight on brighter areas of the radiance map. Finally, there was a bug in lrt in which the BSDF::sample_f() function sometimes returned a non-zero spectrum with a zero weight, resulting in sporadic bright spots in my images.
- Obtaining 3D models: It turned out to be rather cumbersome to find good 3D models. A friend of mine was kind of enough to send me one of his models (the dragon head) in Maya-exported RIB format, which turned out to be rather painless to convert into lrt-readable form. But I wanted something more for the Stanford Quad scene, so I went scouring on the internet for better models, until I came across this site which has a bunch of car models available for download, albeit in Lightwave format. Fortunately, I found this shareware tool which converts to/from many formats, including Lightwave and RIB. Unfortunately, the RIB file it generated dicarded all the materials and lumped everything into one big PointsPolygons object. Ugh. Eventually, after unsuccessfully trying various other freeware conversion tools on the web, I converted the models first into Alias|Wavefront OBJ format using Quick3D, and then wrote a C program which converts OBJ to RIB, keeping the materials intact. This process is not entirely straightforward (which is probably why Quick3D doesn't do it), because an OBJ file contains a global set of materials and vertices that the faces reference. In a RIB file, however, each PointsPolygons object maintains its own set of vertices which are locally referenced, and you can have only one material per PointsPolygons object. Fortunately, documentation describing both OBJ and RIB formats are available on the internet.
Results
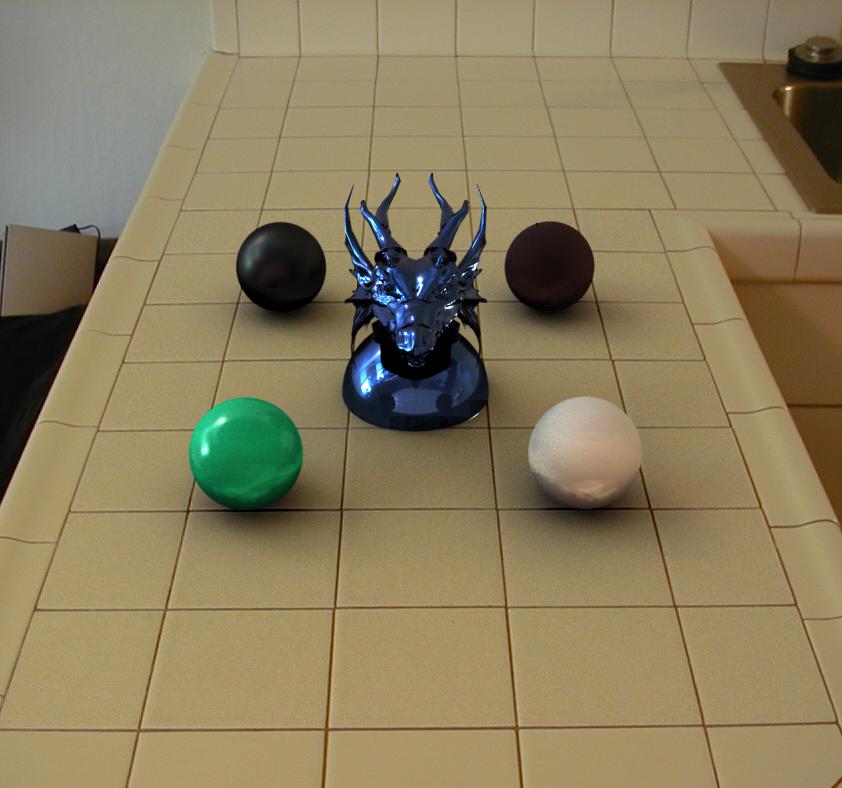
Here are the pretty pictures. This first set shows some (real) pictures of various random objects on the kitchen counter in my studio.
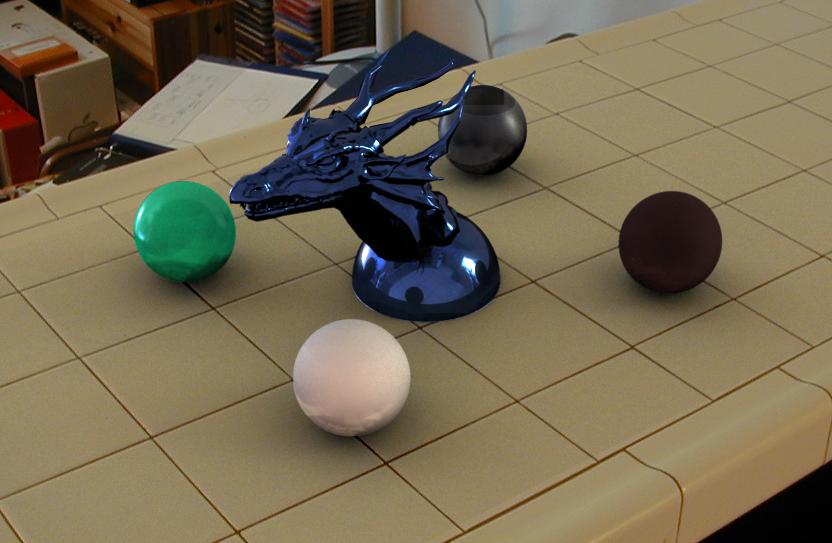
Next are the objects replaced by 3D generated ones (click to enlarge).
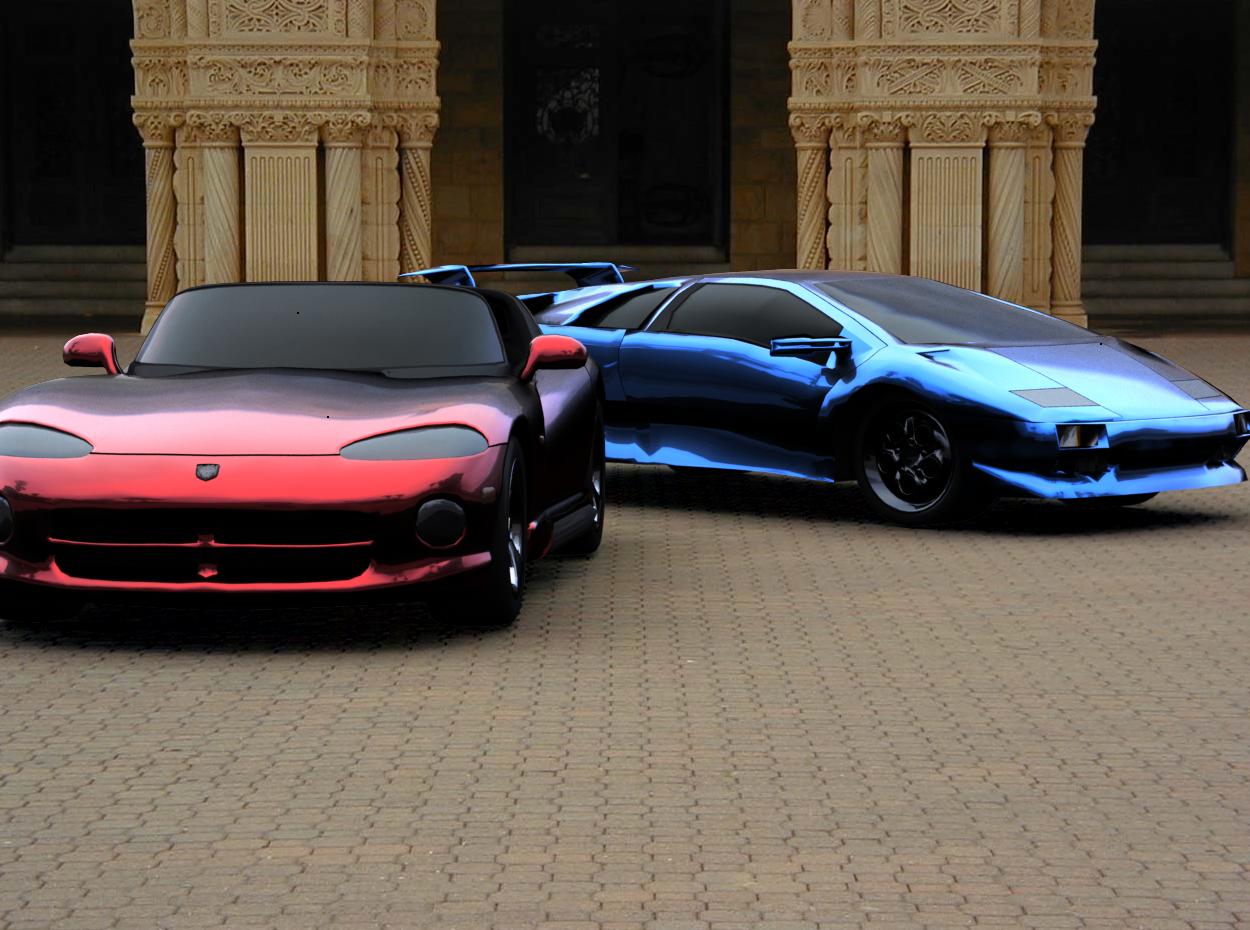
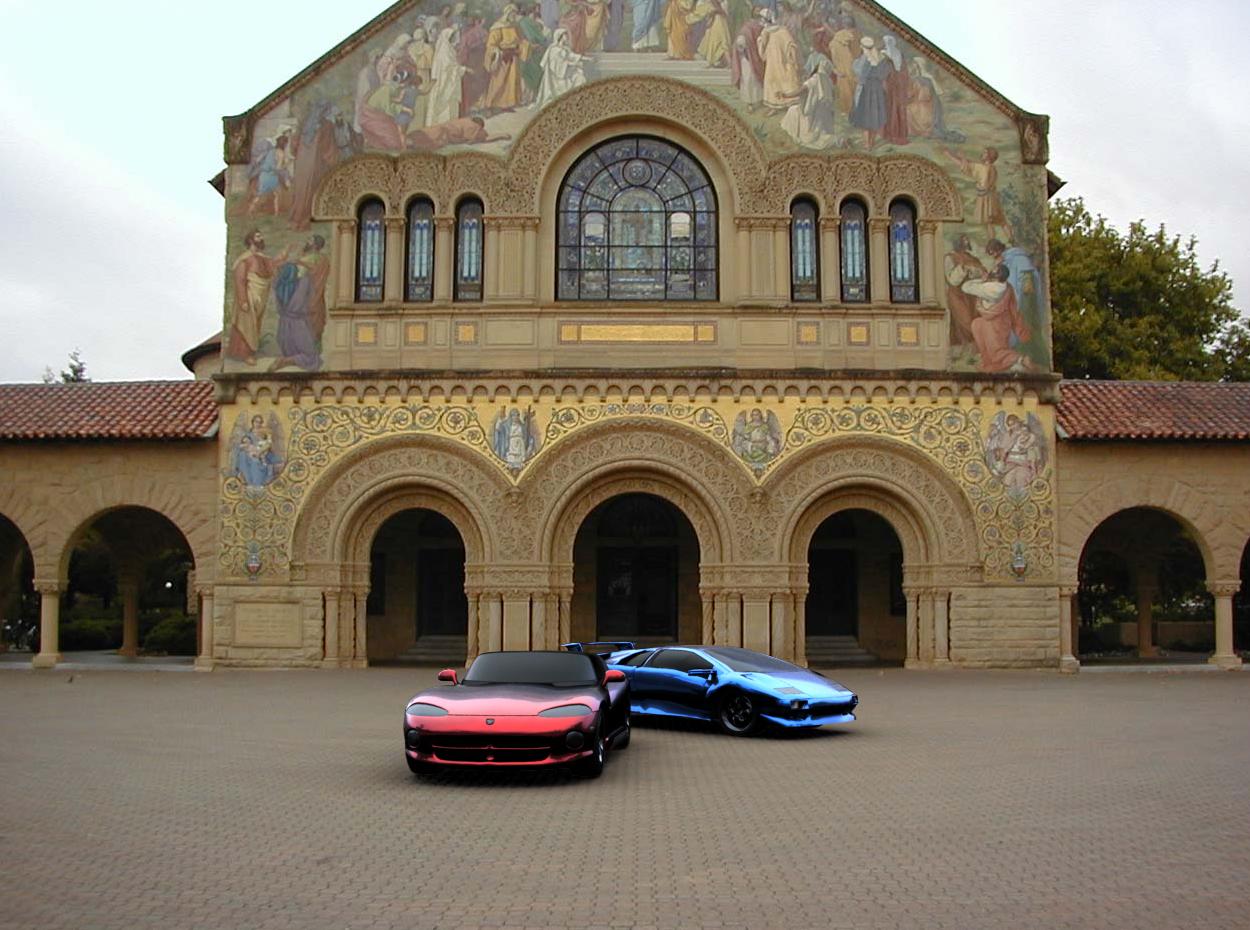
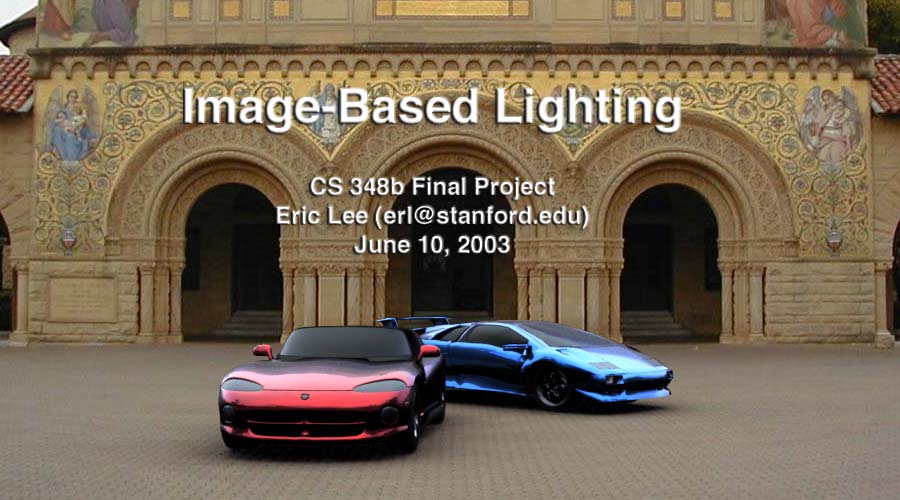
And finally, here are a couple of cars rendered into some pictures I took of the Stanford Quad on an overcast morning. The car on the left is a Chrysler/Dodge Viper RT/10, and the car on the right is a Lamborghini Diablo.
 |
 |
These above two scenes show how my image-based lighting implementation functions under two very different lighting conditions. The studio scene has four main light sources of different colours: two windows with sunlight shining in, and two overhead lights. This results in a various shadows in multiple directions, and multiple specular highlights on the plastic sphere and dragon. The Quad scene was taken on an overcast day, so the shadows are much softer and spread out. Both scenes would probably be reasonably difficult to reproduce without image-based lighting techniques.
The zoomed in car scene, with the largest poly count of 40k, took the longest to render -- approximately 90 minutes on a 1.79 GHz Athlon. The zoomed out car scene took about 80 minutes, and the studio scenes took about 90 minutes. The artifacts on the spheres in the studio scene are caused by inaccuracies in the irradiance caching method -- this can be reduced by increasing the number of irradiance cache samples at the cost of (much) longer render times. All scenes were rendered for a 1280x960 background plate at 16 samples per pixel, and 64 radiance map samples per pixel sample. The irradiance cache threshold was set at 0.2 for the car scenes and 0.05 for the studio scenes.
Conclusions and Stuff-I-Would-Have-Done-If-I-Had-More-Time
I have mainly concentrated on establishing a complete pipeline from data acquistion to the final compositing of image-based lighting images. There are a variety of improvements that can be made in each step of the process, which I did not have time to explore. Some examples include:
- combining multiple light probe images to create a better sampled (at the edges) and more complete picture
- an automatic camera calibration tool
- a more realistic lens model, and incorporating the lens raytracer we did in a previous assignment for depth blurring and other lens-specific effects
- irradiance cache with gradients, similar to what is used in RADIANCE
- recovering actual light information and position from the radiance map and using that to do photon mapping for caustics and indirect lighting; in fact Paul Debevec/Jonathan Cohen already have an unpublished algorithm that does this. I started to implement something similar, but ran out of time before I could incorporate it into my renderer.
Acknowledgements
I would like to thank the following people/groups for their contributions:
- CCRMA, for providing most of the CPU cycles used in rendering the images
- Kevin Chu for providing the dragon model
- DMI for providing car models for free download from their website
References
Copyright © 2003 Eric Lee. Send comments to erl@stanford.edu.
Last updated on June 9, 2003